10 Best Floor Installation Methods for Every Home

Choosing the right floor installation method affects comfort, durability, repair costs, and indoor air quality. The best option depends on the room, subfloor, moisture level, budget, and expected traffic. A busy hallway needs different preparation than a quiet guest room.

Industry data supports careful planning. Grand View Research reports continued growth in the global flooring market, driven by residential construction and renovation demand. Its market analysis also highlights resilient flooring, including luxury vinyl, as a major growth segment. The National Wood Flooring Association emphasizes acclimation, moisture testing, expansion gaps, and subfloor preparation in its technical guidelines. These details are not optional. A beautiful plank can still buckle beside a sunny window if installation conditions are ignored.

This guide examines ten practical floor installation methods for different homes and materials. They include floating floors, full-spread adhesive, nail-down hardwood, staple-down systems, click-lock planks, loose-lay vinyl, tile mortar installation, carpet stretching, and other proven approaches. Each method has clear strengths and limitations. For example, floating floors can reduce installation time, while adhesive systems may provide stronger movement control. Neither choice is automatically superior.

Small details matter. A moisture meter, clean subfloor, correct trowel, and visible expansion space can prevent expensive failures. Still, no method is perfect. Manufacturer instructions vary, and real homes often contain uneven floors, old repairs, or uncertain moisture conditions. Professional assessment remains valuable, especially over concrete or in damp rooms. Use this comparison as a practical starting point, not a substitute for site-specific judgment.
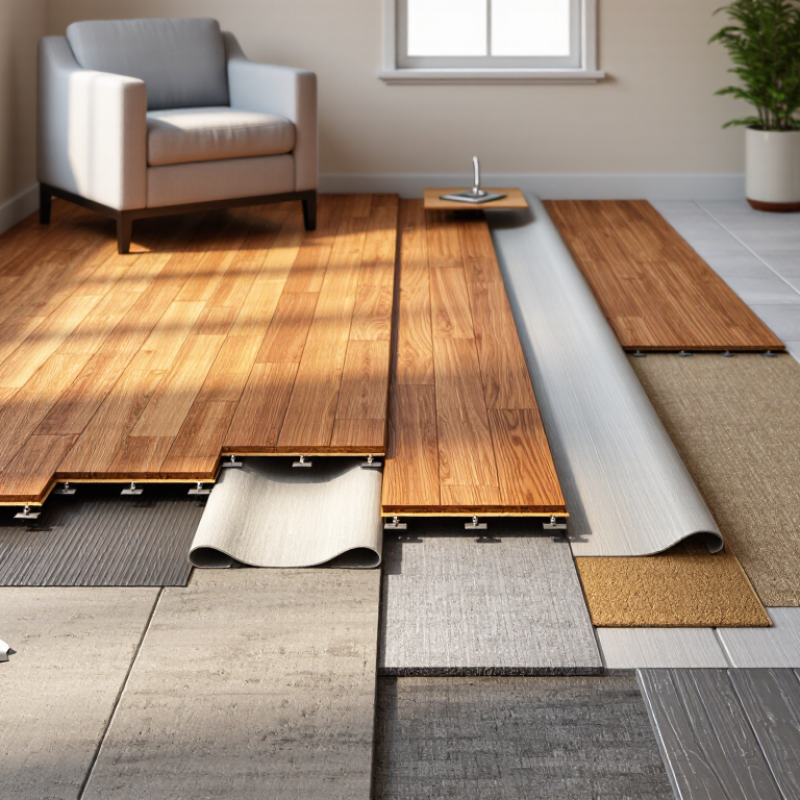
10 Best Floor Installation Methods for Every Home

Choosing the Right Flooring Material for Each Room

Choosing flooring by room starts with moisture, traffic, comfort, and subfloor condition. In bathrooms, porcelain tile or sheet vinyl handles splashes when seams are sealed correctly. Use a bonded mortar installation for tile over a flat, stable base. Small mosaic pieces can improve grip, though extra grout needs regular cleaning. Kitchens need stain resistance and easy repairs. Click-lock laminate, engineered wood, and rigid composite planks suit dry, prepared floors. I prefer floating installation there because damaged boards can be replaced without removing the whole surface. Still, floating floors may sound hollow without an acoustic underlay.

Bedrooms benefit from cork, carpet tiles, or engineered wood, depending on allergies and maintenance habits. Glue-down cork feels warm underfoot, but it demands careful moisture testing. Living rooms can use nail-down wood over plywood, creating a secure, quieter surface. Concrete slabs require different thinking. Glue-down wood or tile usually performs better than traditional nailing. Never ignore expansion gaps; seasonal movement can buckle an otherwise beautiful floor. In hallways, durable porcelain tile or properly locked planks tolerate grit from shoes. A doormat helps, but it will not stop every scratch.

Installation quality often matters more than material price. Measure room humidity, check the subfloor with a straightedge, and follow the flooring manufacturer’s acclimation requirements. I once rushed acclimation on a wood project, and a narrow gap appeared after winter. That mistake still informs my recommendations. Yet every home differs.

Preparing the Subfloor and Measuring the Installation Area

Preparing the subfloor is the quiet foundation of every successful floor installation method. A clean surface is not enough. It must also be flat, dry, and structurally sound.

ASTM F2170 requires in-situ relative-humidity testing at 40% slab depth when concrete dries from one side. That depth matters. Readings from the surface can look safe while moisture remains below. NWFA installation guidelines recommend keeping wood subfloor moisture within 4 percentage points of the flooring for standard strip flooring. Wider planks may require a tighter 2-point range. Use a calibrated meter, record every reading, and allow more drying time when results vary. Do not trust touch alone.

Measure each room at its longest and widest points, then calculate the area in square feet. Include closets, door recesses, and awkward corners. A room rarely behaves like a perfect rectangle. Add about 5% to 10% for cuts, defects, and future repairs, depending on the layout and material. Diagonal patterns need more allowance. Mark door swings and transitions before ordering. Measure twice.

Minor unevenness is easy to underestimate. A long straightedge can reveal ridges that a short level misses. Patch low areas, remove high spots, and fasten loose panels to reduce movement and noise. The NWFA guidelines also emphasize suitable acclimation conditions before wood installation. This step is often rushed, and that is where careful plans become less reliable.

Comparing Floating, Glue-Down, and Nail-Down Methods

10 Best Floor Installation Methods for Every Home

Floating, glue-down, and nail-down floors behave very differently underfoot. A floating floor locks together without permanent attachment. It installs quickly over a prepared subfloor and can tolerate minor movement. However, hollow sounds may appear if the underlayment is uneven. The National Wood Flooring Association’s Installation Guidelines stress moisture testing and expansion spacing before installation. These details matter more than speed.

Glue-down flooring creates firm contact with the subfloor. It can reduce movement and improve sound control, especially in large open rooms. Yet adhesive performance depends on temperature, humidity, and subfloor cleanliness. The Resilient Floor Covering Institute highlights moisture control as a recurring cause of installation failure. Nail-down flooring offers a traditional, solid feel for wood planks. It needs a suitable wood subfloor and careful fastener spacing. Poor placement can cause squeaks. I have seen attractive materials fail because installers trusted appearance instead of measurements. That mistake remains surprisingly common.

Tips: Check the subfloor with a straightedge. Measure moisture in both materials and the subfloor. Leave the manufacturer’s required expansion gap. For concrete, floating or glue-down methods are usually more practical. For timber subfloors, nail-down installation may feel stronger. Still, “stronger” does not always mean better. Floor Covering Weekly’s 2024 market coverage shows resilient flooring continuing to lead U.S. sales, making glue-down and floating systems increasingly relevant for renovations. Confirm the method with a qualified installer before cutting the first plank.

10 Best Floor Installation Methods for Every Home — Comparing Floating, Glue-Down, and Nail-Down Methods
Installation Method Common Flooring Type Typical Subfloor Key Advantages Main Considerations Best Fit
Nail-Down Solid hardwood; some approved engineered wood Wood subfloor, commonly plywood Creates a secure, traditional installation; solid hardwood can often be refinished. Not suitable for concrete without an approved subfloor system. Requires the right flooring thickness and fastening schedule. Dry rooms with a sound wood subfloor.
Staple-Down Solid hardwood and certain engineered wood products Wood subfloor Fast mechanical fastening with installation equipment; similar application to nail-down flooring. Staples must match the flooring system. Incorrect fastener length or spacing can cause movement or damage. Wood-subfloor projects where the flooring manufacturer permits staples.
Glue-Down Engineered Wood Engineered wood flooring Prepared concrete or wood subfloor Can provide a firm, quiet feel and is suitable for some slab installations. Subfloor flatness, moisture testing, adhesive compatibility, and correct trowel technique are essential. Concrete or wood subfloors when the product and adhesive system allow it.
Floating Engineered Wood Click-lock engineered wood Clean, flat concrete or wood subfloor, often with specified underlayment No direct fastening to the subfloor; can be quicker to install and easier to remove than a bonded floor. Needs expansion space at edges. Follow requirements for underlayment, transitions, and room size. Suitable rooms where the flooring is approved for floating installation.
Floating Click-Lock Laminate Laminate planks Flat, dry concrete or wood subfloor Interlocking joints allow a relatively fast installation without glue or fasteners to the subfloor. Many laminate products are vulnerable to standing water. Perimeter clearance and moisture-control instructions matter. Living spaces and bedrooms; moisture-rated products may suit additional areas if approved.
Floating Click-Lock Luxury Vinyl Rigid-core or flexible click-lock vinyl planks and tiles Firm, clean, and sufficiently flat subfloor Planks lock together without being bonded across the entire floor; many products tolerate everyday spills. Subfloor irregularities can affect joints. Confirm room-temperature, expansion, and moisture requirements for the specific product. Busy homes seeking a floating plank or tile floor.
Full-Spread Glue-Down Vinyl Glue-down vinyl plank, tile, or sheet flooring Smooth, clean, dry concrete or approved wood underlayment Provides a firmly bonded floor and avoids floating-floor movement underfoot. Subfloor imperfections may show through. Adhesive selection, open time, and moisture limits must be followed. Areas where a fixed floor is preferred and the subfloor can be carefully prepared.
Full-Spread Sheet Vinyl Resilient sheet vinyl Very smooth, dry, properly prepared subfloor Few seams can make the surface easier to clean; the continuous sheet can suit kitchens and utility areas. Accurate measuring and seam work are important. Some products require full adhesive coverage; others specify different installation rules. Rooms where a continuous resilient surface is useful, subject to product approval.
Thinset Mortar Installation Ceramic or porcelain tile Stable concrete or an approved tile underlayment system Creates a durable, fixed tile installation when the substrate and mortar are correctly selected. Requires a rigid, properly prepared substrate, suitable mortar, grout, and movement joints where specified. Bathrooms, kitchens, and other areas where tile is appropriate for the structure and waterproofing design.
Stretch-In with Tack Strips Broadloom carpet Wood or concrete subfloor, with compatible tack strips and padding Carpet is stretched and held at the perimeter; it can generally be removed without bonding the entire backing to the subfloor. Needs correctly installed tack strips and padding. Not all carpet or room layouts are suitable for this method. Bedrooms and living areas where a cushioned carpet installation is desired.

Suitability varies by flooring product, room conditions, and local requirements. Always follow the flooring and installation-material manufacturers’ instructions, including subfloor preparation and moisture limits.

Installing Flooring Safely and Accurately

10 Best Floor Installation Methods for Every Home

Installing Flooring Safely and Accurately

Safe flooring installation begins with the room, not the product. Check the subfloor for moisture, movement, dust, and uneven areas. A straightedge quickly reveals dips that the eye misses. Repair weak spots before laying planks, tiles, or sheets. Wear safety glasses, knee protection, gloves, and suitable hearing protection when cutting materials. Keep the work area dry and well ventilated.

Different floors require different installation methods. Nail-down flooring needs accurate joist alignment and careful spacing. Glue-down flooring demands clean surfaces and controlled adhesive coverage. Floating floors need expansion gaps around walls and fixed objects. Click-lock systems should close without force.

Loose-lay sheet flooring requires a smooth, stable base. Tile installation depends on correct mortar thickness, level lines, and consistent joint widths. Carpet tiles need a firm, clean surface. Cork and bamboo products require attention to room humidity.

Measure twice. Cut once. It still goes wrong sometimes. I once trusted a wall to be square and wasted several boards. That mistake showed me why reference lines matter more than assumptions. Mark door clearances before cutting, and test-fit difficult sections. Follow the flooring manufacturer’s technical instructions, especially for moisture limits and acclimation time. If the subfloor remains unstable, stop and correct it. A fast installation can hide problems that later cause gaps, lifting, cracking, or unsafe edges. Detailed notes, careful measurements, and patient checks produce a safer, more accurate floor.

Finishing Edges, Seams, and Long-Term Floor Maintenance

A well-installed floor is judged at its edges and seams. I measure the final wall gap before cutting the last boards. This prevents narrow, awkward strips beside the baseboard. Expansion gaps should follow the flooring manufacturer’s specifications and room conditions. They allow seasonal movement without buckling. I cover them with carefully fitted trim, not excessive adhesive. Small gaps can still appear in older homes.

Seams need patience. I stagger end joints and avoid aligning them across nearby rows. For floating floors, I check each locking connection by hand. A raised edge can catch socks, collect grit, and worsen under pressure. In wet areas, I seal approved transitions without blocking necessary movement. Doorways deserve extra attention. A poorly placed threshold becomes a daily trip hazard. I once rushed a transition cut, and the uneven line remained visible in afternoon light. That mistake changed how I inspect every doorway.

Long-term maintenance begins before the first cleaning. I place protective pads beneath heavy furniture and remove loose sand quickly. Grit acts like fine sandpaper under moving chairs. Damp mopping should leave the surface nearly dry. Standing water can reach seams and damage vulnerable layers. I also inspect perimeter trim twice a year. Warped sections, dark seams, or soft spots may signal moisture problems. Avoid aggressive scrubbing until the flooring type is confirmed. Maintenance advice differs between wood, laminate, vinyl, and tile. Even experienced installers can misjudge a material’s tolerance. When uncertain, I test cleaning methods in a hidden corner.