Choosing light gauge metal framing is not simply a matter of comparing prices or steel thicknesses. The right system must match the building’s loads, environment, fire strategy, and construction sequence. A residential partition in a dry interior needs different protection than an exterior wall near salt air. Small details matter. A misplaced track, missing screw, or poorly sealed opening can weaken performance.
This guide explains how to assess gauge, stud depth, coating, connection design, and supplier documentation. It also considers thermal bridging, acoustic control, moisture exposure, and installation tolerances. These factors often appear on drawings, but their consequences become clearer on site. For example, a cold-formed stud may look straight in a warehouse, then twist after careless handling. That observation is practical, not universal. Actual results depend on design, workmanship, and verified product data. Qualified structural and fire professionals should confirm decisions against applicable local requirements.
Reliable selection begins with measured project information, not a convenient catalog assumption. Record spans, openings, wall heights, service routes, humidity, and expected loads before ordering. Ask manufacturers for tested capacities, corrosion information, compatibility guidance, and installation instructions. Independent review is valuable when the frame supports heavy cladding or unusual loads. I have seen teams save money on lighter members, then spend more correcting deflection and damaged finishes. The lesson is uncomfortable: the cheapest profile is rarely the safest choice by itself.
Before selecting light gauge metal framing, translate the project brief into measurable demands. Record wall heights, floor spans, opening sizes, cladding weight, and service loads. Then identify wind, snow, and seismic design inputs for the site. ASCE/SEI 7-22 specifies minimum design loads and associated criteria; a project engineer should apply the relevant local parameters rather than rely on generic tables. Small changes matter. A wide window can interrupt load paths and require stronger jambs or headers.
Set performance goals for strength, deflection, fire resistance, and acoustics before comparing stud sizes. AISI S100-16 provides North American design requirements for cold-formed steel members, while AISI S240-20 addresses structural framing design and installation. Use these as technical references, not substitutes for project-specific calculations. For example, state allowable wall movement under wind and the required floor vibration or deflection limits. Confirm fire-rated assemblies against tested system details, including board layers, stud spacing, insulation, and fasteners. A detail that looks similar may not perform the same.
Also define practical constraints: cavity depth for ducts, corrosion exposure, erection sequence, and available installation tolerances. Ask the design team to document assumptions and load combinations. That makes bids easier to compare. I have seen teams leave service routes vague, then discover that a duct clashes with a brace. It is an avoidable, but common, miss. Decide who verifies shop drawings and field changes before fabrication begins.
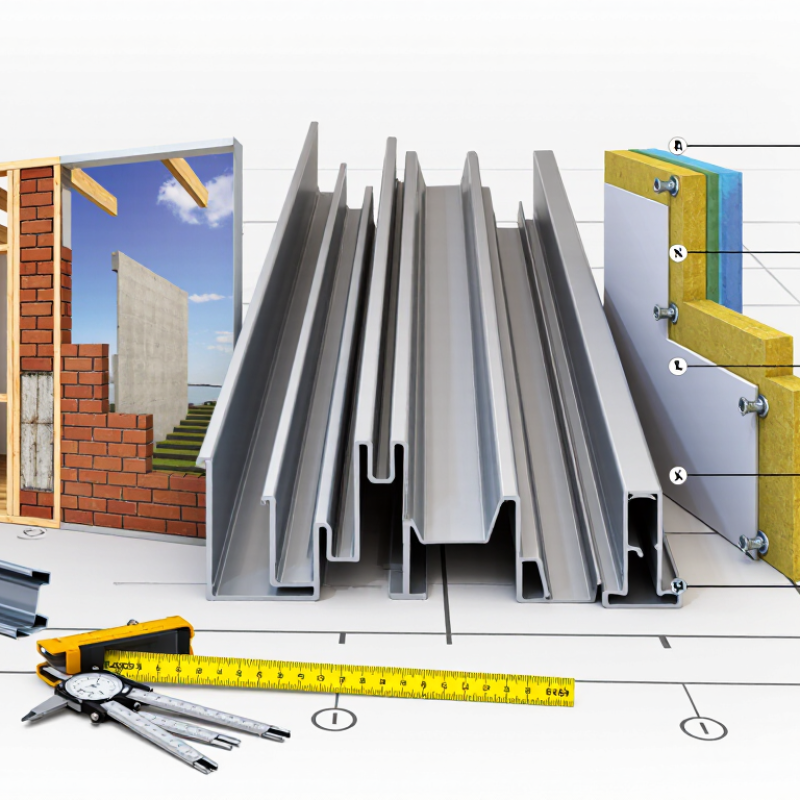
Light gauge framing types suit different loads and layouts. C-studs form walls; track sections connect them at floors and ceilings. Deep, heavier-gauge studs can help support taller walls or heavier cladding, while standard studs often suit interior partitions.
For floors and roofs, joists and trusses provide longer spans, but their spacing and bracing need project-specific design. Check the section depth, thickness, and connection details—not just the label. Small differences matter.
Material grade matters, too. ASTM A1003/A1003M covers steel sheet used in cold-formed framing, with grades including 33 and 50 ksi minimum yield strength. Higher strength may allow a thinner section, but it does not automatically make the best assembly; deflection, screw pull-out, corrosion exposure, and fire-rated details still count.
The American Iron and Steel Institute’s AISI S100 specification provides design rules for cold-formed steel members, while AISI S240 addresses structural framing systems. Useful references.
Confirm the grade and coating on mill certificates, then match them to the engineer’s schedules. That distinction is easy to miss. I’d also verify actual wall height and service penetrations before ordering; drawings can overlook a crowded pipe run.
How to Choose Light Gauge Metal Framing for Your Project?
Evaluate Structural Loads, Building Codes, and Environmental Conditions
Choosing light gauge metal framing starts with the loads it must carry. Account for roof and floor weight, occupants, equipment, and local wind or snow forces. A wall supporting cabinets needs different detailing from a non-load-bearing partition. Check span tables and have a qualified design professional verify member sizes, spacing, and connections. Small changes matter.
Building codes affect framing gauge, fire resistance, bracing, and fastening schedules. Requirements vary by location and building use, so confirm the current local code before ordering materials. Environmental conditions deserve equal care. In humid areas or near coastal air, corrosion protection and compatible fasteners can help prevent premature deterioration. Consider condensation, too. Poorly planned insulation and vapor control can leave moisture trapped against framing. I have seen details overlooked on paper become awkward once services and finishes are installed; coordination is worth the extra review.
Tips: Share load information, drawings, and site conditions with your designer or supplier. Ask how proposed members meet project requirements, and keep the calculations and product documentation with project records. Inspect cut edges and connections during installation. If the site conditions change, pause and reassess rather than relying on the original assumptions.
Use this planning guide to identify the factors that affect framing selection. Member sizes and thicknesses are preliminary examples, not a substitute for project-specific engineering.
| Project condition | Loads and performance to evaluate | Preliminary framing direction | Code and design checks | Environmental considerations |
|---|---|---|---|---|
| Interior, non-load-bearing partition | Wall height, finish weight, door openings, attached fixtures, and allowable deflection. | Common stud depths include 3⅝ in (92 mm) and 6 in (152 mm). Stud spacing such as 16 or 24 in on center may be considered when supported by the wall design and finish requirements. | Confirm the adopted building code, applicable nonstructural framing requirements, wall-height limits, and support conditions. Check manufacturer span tables for the exact member and assembly. | For dry, conditioned interiors, specify a coating appropriate to the intended interior exposure and project specification. Avoid prolonged wetting during storage and construction. |
| Exterior curtain wall or façade infill | Wind pressure and suction, wall height, cladding weight, support spacing, and serviceability deflection criteria. | Select stud depth, design thickness, and spacing from project-specific wind and deflection calculations. Deeper or thicker members, closer spacing, or intermediate bracing may be needed as demands increase. | Use site-specific wind loads and applicable code provisions. Check member strength, deflection, bridging, connections, anchorage, and load transfer to the primary structure. | Coordinate corrosion protection with the exposure, moisture management, and compatible fasteners. Detail the wall to drain and dry; do not rely on framing coating as a replacement for a water-management system. |
| Load-bearing wall | Axial loads, eccentricity, floor or roof reactions, wind or seismic forces, and combined compression and bending. | Use structural studs and track selected by calculation. Design thickness, member geometry, spacing, built-up members, and bearing details must match the applied loads and restraint conditions. | Require design by a qualified professional under the locally adopted code and applicable cold-formed steel standards, such as AISI S100 and AISI S240 where adopted. Check studs, tracks, connections, bracing, and load paths. | Specify steel and coating suitable for the service exposure. Consider leaks, condensation, chemical exposure, and dissimilar-metal contact in the assembly. |
| High wall, parapet, or tall partition | Unsupported height, lateral pressure, deflection limits, top and bottom restraint, and any concentrated loads. | Evaluate deeper or thicker studs, reduced spacing, deflection tracks, bridging, or intermediate supports. The appropriate solution depends on the boundary conditions and design loads. | Check stability, local and distortional buckling, connection capacity, and serviceability. Verify that deflection-track details allow the required structural movement without compromising the wall. | For exterior parapets, account for direct weather exposure, drainage, and water entry at the roof-wall interface. Select corrosion protection for the actual exposure. |
| Wet, coastal, or chemically exposed area | Structural loads remain essential; also assess expected wetting, humidity, salt exposure, cleaning agents, and the consequences of corrosion. | Choose the member and protective system based on engineering requirements and documented exposure suitability. Do not assume one coating designation is appropriate for every site or assembly. | Confirm product standards, project specifications, local code requirements, and compatibility of coatings, fasteners, anchors, and adjacent materials. | Review corrosion risk with the design team. Control water entry and trapped moisture, provide drainage where appropriate, and follow product guidance for storage, handling, and installation. |
| Fire-rated or acoustically rated assembly | Assembly loads, required fire-resistance rating, acoustic targets, penetrations, and movement at joints. | Select framing as part of a tested or listed wall assembly. Stud depth and spacing must be consistent with the assembly design and project requirements. | Follow the applicable tested or listed assembly, including board layers, fasteners, insulation, joints, and penetrations. Confirm whether the proposed framing substitutions are permitted. | Consider moisture exposure and material compatibility without changing components in a way that invalidates the specified assembly performance. |
Selection note: Gauge labels are not a reliable substitute for specified design thickness. Verify the actual steel thickness, steel properties, coating, and product standard in the approved submittals. Final member selection should be based on project loads, code requirements, manufacturer data, and professional design where required.
Choosing light gauge metal framing starts with compatible profiles, correct gauges, reliable connections, and suitable protective coatings. Begin with the load path, not the product list. Wall studs, tracks, joists, and furring channels must work together within the design.
Stud dimensions should match the wall height, spacing, insulation depth, and expected loads. Non-load-bearing partitions may use lighter gauges, while structural walls often require thicker steel and closer spacing. Thicker is not always better. It can increase weight, cutting time, and installation cost. Do not guess.
Connections deserve equal attention. Select screws, bolts, clips, or welds that suit the steel thickness and transfer the required forces. Check edge distances and avoid distorted flanges. On site, rushed fastening often causes uneven faces and loose joints. That mistake is easy to overlook until boards are installed.
Tips:
Confirm profile compatibility before ordering. Keep drawings, load data, and coating requirements together. Use corrosion-resistant coatings in humid, coastal, or chemically exposed areas. Galvanized protection may be suitable, but damaged cut edges still need careful treatment. Inspect delivered members for scratches, oil, and bent sections. A small defect can become a larger alignment problem. Review local structural and fire requirements with a qualified professional, because project conditions vary. Too many specifications can also confuse the crew. Clear details usually perform better.
How to Choose Light Gauge Metal Framing for Your Project?
Installation quality begins before the first stud reaches the site. Confirm whether the design follows AISI S240 for structural cold-formed steel framing or ASTM C645 for nonstructural members. These standards define member performance, screw connections, bracing, and installation tolerances. Ask for shop drawings, load calculations, and written fixing details. A frame can look straight while hiding weak connections.
Check the installation method in practical detail. Confirm stud spacing, track anchorage, deflection gaps, corrosion protection, and service penetrations. ASTM C754 addresses the installation of steel framing members, including fastening and alignment requirements. Site records should include delivery inspections, screw patterns, torque checks, and photographs before boarding. Small deviations become expensive later. They often do.
Supplier evaluation needs evidence, not polished promises. Request mill certificates, coating specifications, batch traceability, and independent test results. The 2024 World Steel Association World Steel in Figures report recorded about 1.89 billion tonnes of crude steel production in 2023. That scale shows a global supply chain, but it does not guarantee consistent framing quality. Audit samples for thickness, flange width, straightness, and coating damage. One overlooked issue remains common: drawings may specify one gauge, while delivered material quietly uses another. Plan periodic inspections, control moisture exposure, and replace damaged coatings promptly. Maintenance assumptions should be written, not remembered.